
Do you want to keep that big fish on the line? These three knots will help. Practice before you go so you are familiar with them.
By Larry Pape, Fisheries Education Specialist
The Improved Cinch Knot
This is the most commonly taught fishing knot and can be used on monofilament line to attach a hook, lure, or swivel. The knot is simple to remember and the line retains nearly all of its strength.
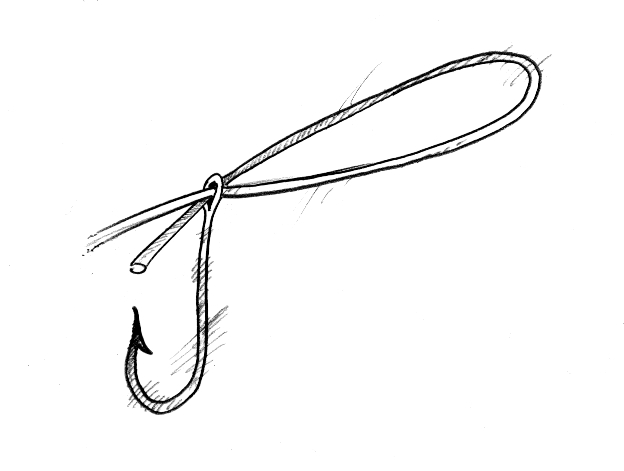
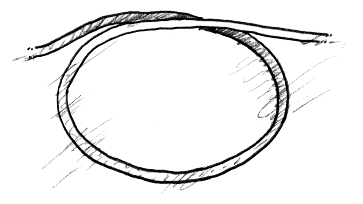
1. Thread the loose end of the line through the eye of the hook, pulling through plenty of line to make your knot.
2. Wrap the line around itself, creating 5 to 7 twists. Too few twists in the line will result in a knot that pulls out. Too many twists in the line will weaken the line. Holding the loose end secure against the line and turning the hook with the other hand is an easy way to create twists in the line.
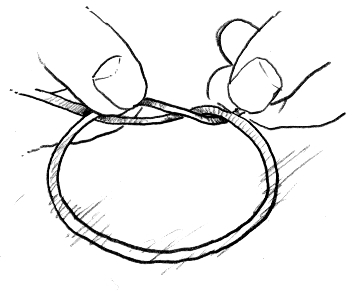
3. Holding on to the twisted line, thread the loose end of the line through the loop near the eye of the hook.
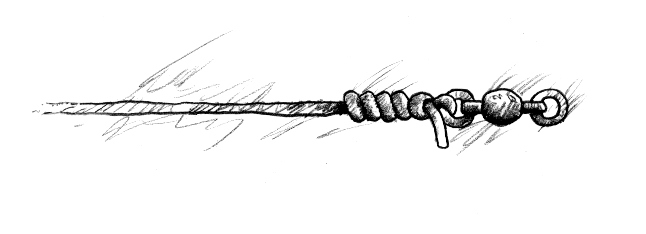
4. Notice the new loop that was created by threading the line. Run the loose end of the line through the new loop.
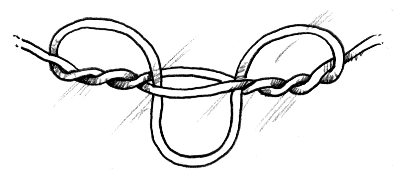
5. Hold the loose end against the hook with one hand and with the other hand, gently pull the line away from the hook to tighten the knot against the eye of the hook. Wetting the line with your mouth before tightening it will help the line cinch down and will reduce friction that could weaken the line.
6. Neaten the knot so that the coils are stacked up tightly behind the eye of the hook.
7. Trim any excess line from the loose end to about one-quarter inch.
The Palomar Knot
This is another simple and versatile knot that retains nearly all of the line strength after it is tied. The Palomar should be used when fishing with braided line. An improved clinch knot will pull loose on braided line.
1. Thread the loose end of the line through the eye of the hook, pulling through plenty of line.
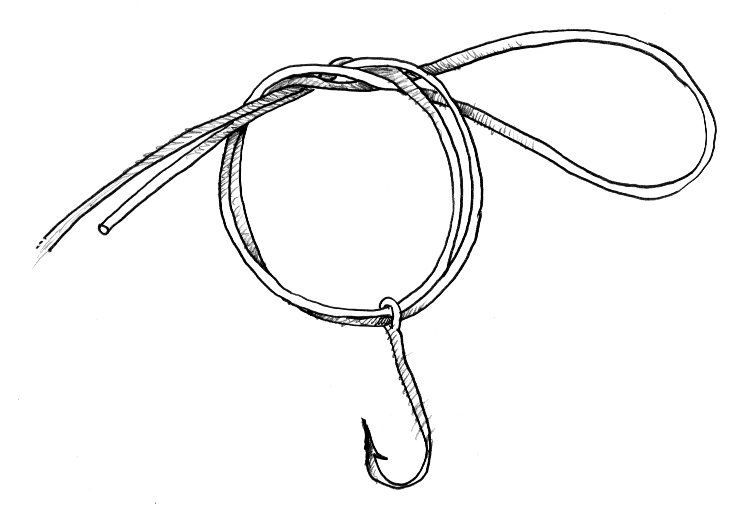
2. Thread the loose end back through the eye of the hook, creating a large loop that passes through the eye of the hook.
3. Holding the loose end against the line with a thumb and forefinger, use the other hand to tie a simple overhand knot with the loop. Do not tighten the line.
4. Place the hook or lure through the loop.
5. Pull the loop gently to tighten the knot down against the eye of the hook.
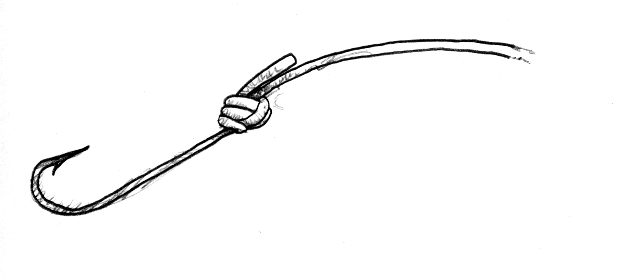
The Dropper Knot
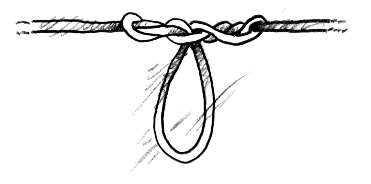
The dropper knot forms a loop that will hold a hook or sinker away from the line.
1. Form a loop with the line.
2. Pull one side of the loop down and wrap it around the standing line. Hold the point where the turns are made open, so the number of turns will be equal on each side of the opening.
3. Make eight or ten turns, then reach through the center opening and pull the remaining loop through. Hold the loop so it will not spring back through the opening.
4. Hold the loop open and pull both ends of the line, drawing the turns together on each side of the loop.
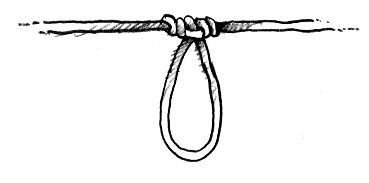
5. Pull the ends tight. ■
The post Tying Fishing Knots appeared first on Nebraskaland Magazine.


