Enlarge

Photo by Ryan Sparks
By Ryan Sparks
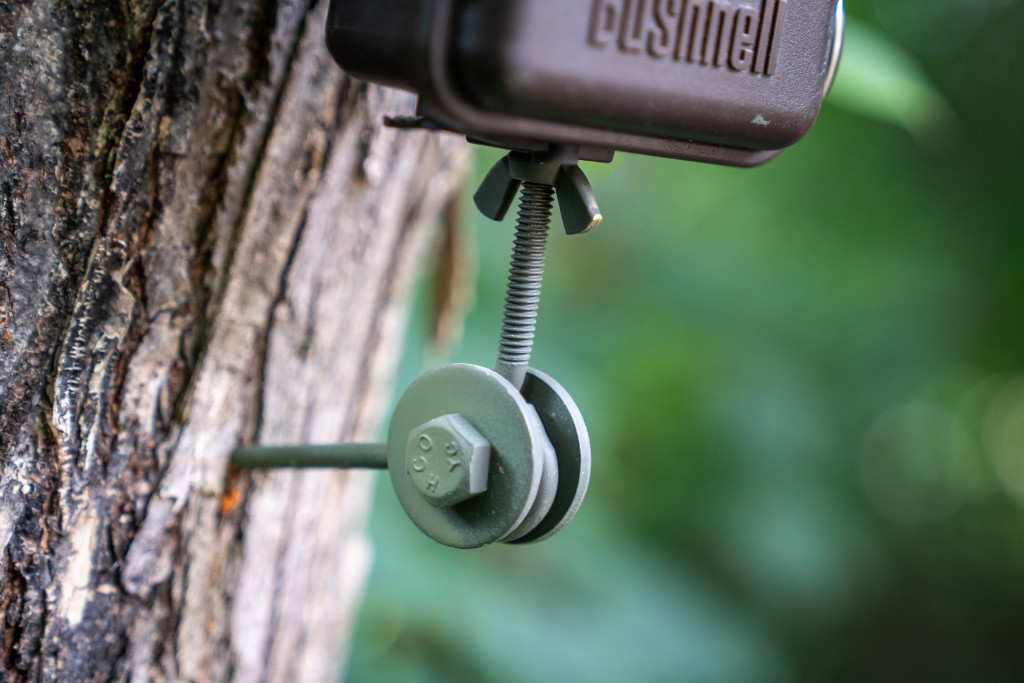
It is the time of year when hunters start thinking about deer and preparing for the upcoming season. A part of that process is placing trail cameras to take an inventory of the deer on the property you hunt. The right trail camera in the right spot can be the key to tagging the buck of a lifetime. But getting a trail camera placed just right is easier said than done. Trees rarely grow perfectly straight, and they are seldom the ideal diameter for a trail camera strap. Screw-in trail camera mounts are great for getting your camera in exactly the right spot and positioned at the perfect angle, but they are expensive, often sold for around $25.
Using materials commonly found at most hardware stores, you can make your own screw-in trail camera mounts for less than $5. Even better, the mount takes less than a minute to assemble. Here’s how to put it together.

Materials:
• 1⁄4″ x 33⁄4″ eye screw
• 1⁄4″ x 20 x 3″ eye bolt
• 1⁄4″ wing nut
• 3⁄8″ x 1″ hex bolt
• 3⁄8″ locking nut
• 3⁄8″ x 11⁄4″ fender washers (x3)
Directions:
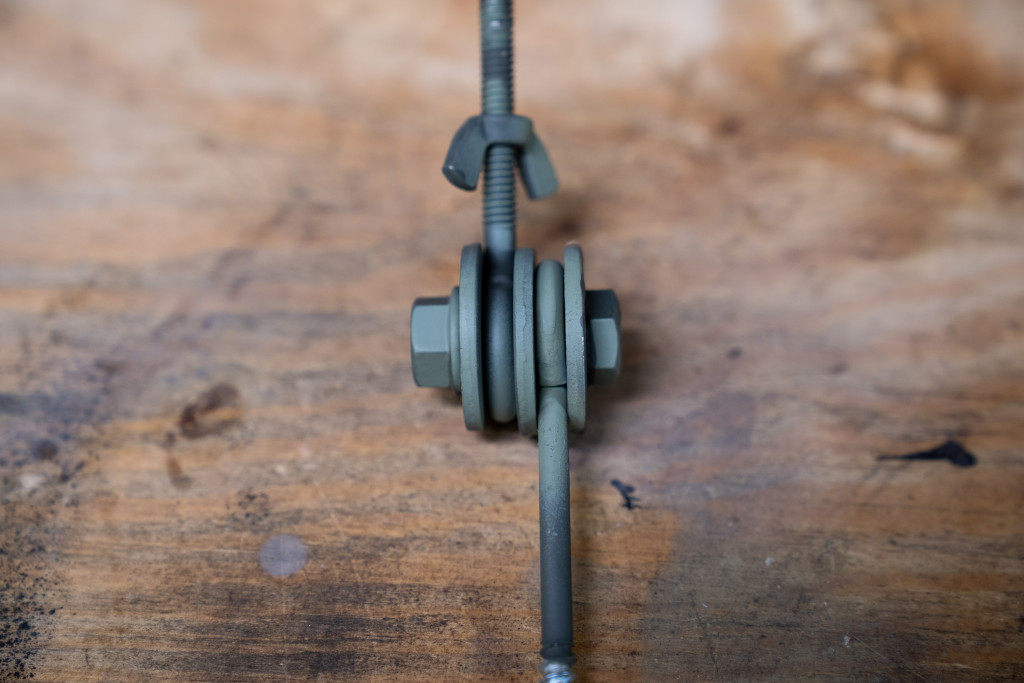
• Add a washer to the hex bolt.
• Next, thread the eye screw onto
the bolt next to the first washer.
• Add a second washer.
• Add the eye bolt.
• Add the third and final washer.
• Lastly, screw the hex nut onto the bolt.
• Add the wing nut to the eye bolt, screwing it on upside down so you can use it to secure the trail camera later.
• Tighten the nut to your desired tension with a 9⁄16 wrench or pliers. I like it tight enough so it won’t move under the weight of a trail camera, but with enough give that it allows adjustment when mounting the camera.
Optional: I like to spray my trail camera mounts with flat camouflage paint to remove the shine of the metal.
NOTE: In Nebraska, it is illegal to place trail cameras on private property without permission from the landowner.
Ryan Sparks is a freelance outdoor writer and photographer. See more of his work at sparksryan.com.
The post DIY Trail Camera Mount appeared first on Nebraskaland Magazine.


